Preserving Apples: A Step-by-Step Guide to Canning Sliced Apples in Light Syrup

apples
1
Hi there! Welcome to Outdoors and Country Living. My name is Leanne, and today, I will be showing you how to preserve apples from our orchard by canning them in a light syrup. Stick around to see how it's done!

2
Why Preserve Apples?
Our apples are grown organically without any sprays or chemicals, resulting in blemished but natural and healthy fruit. Preserving these apples not only fills our pantry with delicious fruit but also reduces waste. Let's get started!
Ingredients and Equipment
Apples (preferably organic)
4 cups of pure cane sugar
1 gallon (16 cups) of water
Fruit Fresh Produce Protector
Quart mason jars with lids and bands
Large stainless steel pot
Apple peeler/corer/slicer (optional)
Kitchen knife
Narrow de-bubbling spatula
Preparing the Apples
Wash the Apples: Rinse the apples under cold water to remove any dirt.
Peel, Core, and Slice: Use an apple machine to peel, core, and slice the apples into quarter-inch pieces. If you don't have an apple machine, use a kitchen knife to peel, core, and slice the apples manually.
Making the Syrup
Combine Sugar and Water: In a large stainless steel pot, mix 4 cups of pure cane sugar with 16 cups of water. This ratio creates a light syrup.

3
Add Fruit Fresh Produce Protector: To prevent browning, add 3 rounded tablespoons of Fruit Fresh Produce Protector per 2 quarts of water. Stir to combine.
Cooking the Apples
Submerge Apple Slices: Place the prepared apple slices into the syrup mixture, ensuring they are fully submerged to prevent browning.
Cook the Apples: Heat the syrup and apples over medium heat for 5-10 minutes until the apples are slightly soft and pliable. Stir occasionally.
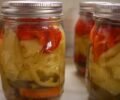
Canning Process
Prepare the Jars: Use clean quart mason jars. No need to sterilize them as they will be processed in the water bath canner.

4
Fill the Jars: Pack the cooked apple slices tightly into each jar, leaving a half-inch headspace.
Add Syrup: Pour the hot syrup into each jar, maintaining the half-inch headspace. Remove any air bubbles using a narrow de-bubbling spatula.
Wipe the Rims: Clean the rims of the jars with a damp washcloth or paper towel to ensure a good seal.
Apply Lids and Bands: Place the lids on the jars and secure with bands until fingertip tight. Do not over-tighten.
Water Bath Canning
Prepare the Canner: Place the jars in a water bath canner with warm water, ensuring the water covers the jars by 1-2 inches.
Process the Jars: Turn the burner to high and bring the water to a rolling boil. Once boiling, process the jars for 20 minutes.

5
Cool Down: After 20 minutes, turn off the heat, remove the lid, and let the jars sit in the hot water for 10 minutes to prevent siphoning.
Remove the Jars: Carefully remove the jars and place them on a towel to cool for 12-24 hours.

6
Final Steps
Check the Seals: After 12-24 hours, check that the lids are sealed properly. Remove the bands, wash the jars, and dry them.
Label and Store: Label the jars with the date and contents, and store them in a cool, dry place.

7
Conclusion
And that's it! You now have beautifully canned apple slices in light syrup, ready to use for a multitude of recipes.
Happy canning!

Ingredients
apples
Directions
1
Hi there! Welcome to Outdoors and Country Living. My name is Leanne, and today, I will be showing you how to preserve apples from our orchard by canning them in a light syrup. Stick around to see how it's done!
2
Why Preserve Apples?
Our apples are grown organically without any sprays or chemicals, resulting in blemished but natural and healthy fruit. Preserving these apples not only fills our pantry with delicious fruit but also reduces waste. Let's get started!
Ingredients and Equipment
Apples (preferably organic)
4 cups of pure cane sugar
1 gallon (16 cups) of water
Fruit Fresh Produce Protector
Quart mason jars with lids and bands
Large stainless steel pot
Apple peeler/corer/slicer (optional)
Kitchen knife
Narrow de-bubbling spatula
Preparing the Apples
Wash the Apples: Rinse the apples under cold water to remove any dirt.
Peel, Core, and Slice: Use an apple machine to peel, core, and slice the apples into quarter-inch pieces. If you don't have an apple machine, use a kitchen knife to peel, core, and slice the apples manually.
Making the Syrup
Combine Sugar and Water: In a large stainless steel pot, mix 4 cups of pure cane sugar with 16 cups of water. This ratio creates a light syrup.
3
Add Fruit Fresh Produce Protector: To prevent browning, add 3 rounded tablespoons of Fruit Fresh Produce Protector per 2 quarts of water. Stir to combine.
Cooking the Apples
Submerge Apple Slices: Place the prepared apple slices into the syrup mixture, ensuring they are fully submerged to prevent browning.
Cook the Apples: Heat the syrup and apples over medium heat for 5-10 minutes until the apples are slightly soft and pliable. Stir occasionally.
Canning Process
Prepare the Jars: Use clean quart mason jars. No need to sterilize them as they will be processed in the water bath canner.
4
Fill the Jars: Pack the cooked apple slices tightly into each jar, leaving a half-inch headspace.
Add Syrup: Pour the hot syrup into each jar, maintaining the half-inch headspace. Remove any air bubbles using a narrow de-bubbling spatula.
Wipe the Rims: Clean the rims of the jars with a damp washcloth or paper towel to ensure a good seal.
Apply Lids and Bands: Place the lids on the jars and secure with bands until fingertip tight. Do not over-tighten.
Water Bath Canning
Prepare the Canner: Place the jars in a water bath canner with warm water, ensuring the water covers the jars by 1-2 inches.
Process the Jars: Turn the burner to high and bring the water to a rolling boil. Once boiling, process the jars for 20 minutes.
5
Cool Down: After 20 minutes, turn off the heat, remove the lid, and let the jars sit in the hot water for 10 minutes to prevent siphoning.
Remove the Jars: Carefully remove the jars and place them on a towel to cool for 12-24 hours.
6
Final Steps
Check the Seals: After 12-24 hours, check that the lids are sealed properly. Remove the bands, wash the jars, and dry them.
Label and Store: Label the jars with the date and contents, and store them in a cool, dry place.
7
Conclusion
And that's it! You now have beautifully canned apple slices in light syrup, ready to use for a multitude of recipes.
Happy canning!
Leave a Review
Please log in or register for a new account in order to leave a review.