How to Pressure Can Potatoes: A Step-by-Step Guide

Hello from Great Lakes Prepping! Today is canning day, and we’re focusing on potatoes. Canning potatoes is a straightforward process, though it requires a pressure canner since potatoes are a low-acid food. Follow this detailed guide to safely and successfully can your own potatoes at home.
What You’ll Need:
Ingredients:
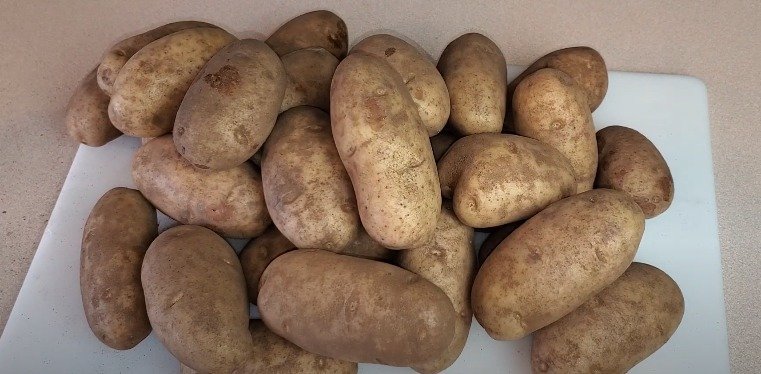
10 pounds of medium-sized Idaho potatoes (or any variety)
Water
Kosher salt (optional)
Equipment:
Pressure canner
Quart-sized or pint-sized mason jars
Lids and bands
Large pots
Colander
Canning funnel
Headspace measuring tool (or debubbler)
Jar lifter
Slotted spoon
Paper towels
Preparing the Potatoes
Peel the Potatoes: Begin by peeling all your potatoes. This step is crucial for ensuring the heat penetrates evenly during canning, effectively killing any bacteria.
Prevent Browning: Place the peeled potatoes in a large bowl of cold water to prevent them from turning brown while you work.

Cutting and Parboiling the Potatoes
Cut the Potatoes: Remove the potatoes from the water one at a time and cut them into half-inch cubes. Place the cubes into another pot of cold water.
Parboil the Potatoes: Heat a large stockpot of water on the stove. Once it reaches a boil, add the diced potatoes and boil for two minutes. Strain the potatoes using a colander.
Preparing the Jars
Clean the Jars: Thoroughly clean your mason jars with dish soap and water. Modern recommendations suggest that sterilizing jars by boiling is unnecessary if they will be processed for a substantial time in a pressure canner.
Fill the Jars: Using a canning funnel and a slotted spoon, fill the jars with the parboiled potato cubes, leaving one inch of headspace.
Adding Salt and Water
Add Salt (Optional): If desired, add half a teaspoon of kosher salt to each jar.
Add Boiling Water: Pour boiling water over the potatoes in each jar, maintaining the one-inch headspace. Use your headspace measuring tool to ensure accuracy.
Debubbling and Sealing the Jars
Remove Air Bubbles: Use a debubbler or a similar tool to remove any air bubbles from the jars. Gently tap the jars on the counter to help dislodge trapped air.
Wipe the Rims: Use a damp paper towel to wipe the rims of the jars, ensuring they are clean and free of residue.
Add Lids and Bands: Place the lids on the jars and screw on the bands until they are fingertip tight.
Pressure Canning Process
Prepare the Pressure Canner: Add three quarts of water to your pressure canner and load the jars, making sure they are not touching each other or the canner walls.
Vent the Canner: Heat the canner on high. When steam begins to escape from the vent, let it vent for 10 minutes.
Add the Weight: Place the weight on the vent. For most areas, use a 10-pound weight. If you are above 1,000 feet in altitude, use a 15-pound weight.
Build Pressure: Allow the pressure to build. Once the weight begins to rock gently, reduce the heat slightly to maintain a steady rocking motion.
Process the Jars: Process quart jars for 40 minutes and pint jars for 35 minutes.

Cooling and Storing
Cool the Canner: Turn off the heat and let the canner cool naturally. Do not attempt to open it until the pressure has fully released.
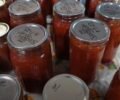
Remove and Cool the Jars: Use a jar lifter to transfer the jars to a counter lined with a towel. Let them cool undisturbed for several hours or overnight.
Check the Seals: Once cooled, check the seals by pressing the center of each lid. If it does not pop, the jar is sealed. Remove the bands and store the sealed jars in your pantry.

Conclusion
Congratulations! You’ve successfully canned potatoes, making them shelf-stable and ready for future meals. Enjoy your home-canned potatoes . Happy canning!
Ingredients
Directions
Hello from Great Lakes Prepping! Today is canning day, and we’re focusing on potatoes. Canning potatoes is a straightforward process, though it requires a pressure canner since potatoes are a low-acid food. Follow this detailed guide to safely and successfully can your own potatoes at home.
What You’ll Need:
Ingredients:
10 pounds of medium-sized Idaho potatoes (or any variety)
Water
Kosher salt (optional)
Equipment:
Pressure canner
Quart-sized or pint-sized mason jars
Lids and bands
Large pots
Colander
Canning funnel
Headspace measuring tool (or debubbler)
Jar lifter
Slotted spoon
Paper towels
Preparing the Potatoes
Peel the Potatoes: Begin by peeling all your potatoes. This step is crucial for ensuring the heat penetrates evenly during canning, effectively killing any bacteria.
Prevent Browning: Place the peeled potatoes in a large bowl of cold water to prevent them from turning brown while you work.
Cutting and Parboiling the Potatoes
Cut the Potatoes: Remove the potatoes from the water one at a time and cut them into half-inch cubes. Place the cubes into another pot of cold water.
Parboil the Potatoes: Heat a large stockpot of water on the stove. Once it reaches a boil, add the diced potatoes and boil for two minutes. Strain the potatoes using a colander.
Preparing the Jars
Clean the Jars: Thoroughly clean your mason jars with dish soap and water. Modern recommendations suggest that sterilizing jars by boiling is unnecessary if they will be processed for a substantial time in a pressure canner.
Fill the Jars: Using a canning funnel and a slotted spoon, fill the jars with the parboiled potato cubes, leaving one inch of headspace.
Adding Salt and Water
Add Salt (Optional): If desired, add half a teaspoon of kosher salt to each jar.
Add Boiling Water: Pour boiling water over the potatoes in each jar, maintaining the one-inch headspace. Use your headspace measuring tool to ensure accuracy.
Debubbling and Sealing the Jars
Remove Air Bubbles: Use a debubbler or a similar tool to remove any air bubbles from the jars. Gently tap the jars on the counter to help dislodge trapped air.
Wipe the Rims: Use a damp paper towel to wipe the rims of the jars, ensuring they are clean and free of residue.
Add Lids and Bands: Place the lids on the jars and screw on the bands until they are fingertip tight.
Pressure Canning Process
Prepare the Pressure Canner: Add three quarts of water to your pressure canner and load the jars, making sure they are not touching each other or the canner walls.
Vent the Canner: Heat the canner on high. When steam begins to escape from the vent, let it vent for 10 minutes.
Add the Weight: Place the weight on the vent. For most areas, use a 10-pound weight. If you are above 1,000 feet in altitude, use a 15-pound weight.
Build Pressure: Allow the pressure to build. Once the weight begins to rock gently, reduce the heat slightly to maintain a steady rocking motion.
Process the Jars: Process quart jars for 40 minutes and pint jars for 35 minutes.
Cooling and Storing
Cool the Canner: Turn off the heat and let the canner cool naturally. Do not attempt to open it until the pressure has fully released.
Remove and Cool the Jars: Use a jar lifter to transfer the jars to a counter lined with a towel. Let them cool undisturbed for several hours or overnight.
Check the Seals: Once cooled, check the seals by pressing the center of each lid. If it does not pop, the jar is sealed. Remove the bands and store the sealed jars in your pantry.
Conclusion
Congratulations! You’ve successfully canned potatoes, making them shelf-stable and ready for future meals. Enjoy your home-canned potatoes . Happy canning!