
Canning Butternut Squash: A Step-by-Step Guide
1
Happy thursday ! Today, I'm sharing a quick guide on canning butternut squash, perfect for those brisk mornings when the sun is out, and you're ready to stock up your pantry. While I don't have the time to set up a full tutorial with a camera and tripod, I hope this snippet inspires you to try canning this delicious vegetable.
Preparation:
Start by blanching your butternut squash. This helps in packing the squash tighter in the jars without causing density issues. I like to use pint jars for this process. Ensure your jars, lids, and bands are all properly sterilized. I soak my lids in hot water to soften the sealing compound.

2
Filling the Jars:
Packing the Squash: Place the blanched squash pieces into the jars. Aim for a 1-inch headspace. Use a de-bubbler to remove any air pockets, which can significantly lower the water level in the jar.

3
Cleaning the Rims: Before sealing, wipe the jar rims with straight vinegar. Some people use a half-and-half solution of water and vinegar, but I find that straight vinegar works best. Always use a clean end of a napkin or cloth to avoid contamination.
Sealing the Jars: Place the lids on the jars and tighten the bands fingertip-tight. Ensure the bands are not overly tight to allow air to escape during processing.

4
Canning Process:
Preparing the Canner: Get your canner ready on the stove. Place the filled jars into the canner and ensure there's enough water to cover them.

5
Processing: Process the jars under pressure for 55 minutes, as recommended by the USDA's Complete Guide to Home Canning. This step is crucial for safety and preserving the squash properly.

6
Post-Processing:
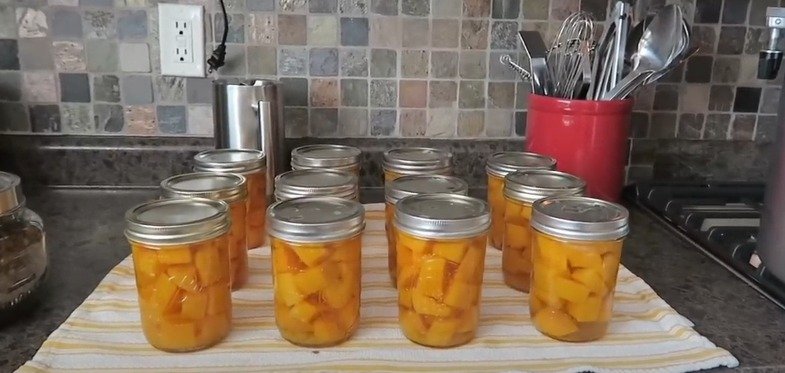
Once the canning process is complete, carefully remove the jars from the canner and let them cool. Listen for the magical sound of lids popping, indicating a proper seal.
Final Touches:
For those dealing with hard water, adding a bit of vinegar to the water in the canner can help prevent clouding on the jars. Once cooled, check the seals, and store your beautifully canned butternut squash in a cool, dark place.
Conclusion:
Canning butternut squash is a rewarding process that provides you with delicious, ready-to-eat squash for the winter. Whether you're new to canning or a seasoned pro, I hope this inspires you to add butternut squash to your canning repertoire. Enjoy the process and the wonderful results!

Ingredients
Directions
1
Happy thursday ! Today, I'm sharing a quick guide on canning butternut squash, perfect for those brisk mornings when the sun is out, and you're ready to stock up your pantry. While I don't have the time to set up a full tutorial with a camera and tripod, I hope this snippet inspires you to try canning this delicious vegetable.
Preparation:
Start by blanching your butternut squash. This helps in packing the squash tighter in the jars without causing density issues. I like to use pint jars for this process. Ensure your jars, lids, and bands are all properly sterilized. I soak my lids in hot water to soften the sealing compound.
2
Filling the Jars:
Packing the Squash: Place the blanched squash pieces into the jars. Aim for a 1-inch headspace. Use a de-bubbler to remove any air pockets, which can significantly lower the water level in the jar.
3
Cleaning the Rims: Before sealing, wipe the jar rims with straight vinegar. Some people use a half-and-half solution of water and vinegar, but I find that straight vinegar works best. Always use a clean end of a napkin or cloth to avoid contamination.
Sealing the Jars: Place the lids on the jars and tighten the bands fingertip-tight. Ensure the bands are not overly tight to allow air to escape during processing.
4
Canning Process:
Preparing the Canner: Get your canner ready on the stove. Place the filled jars into the canner and ensure there's enough water to cover them.
5
Processing: Process the jars under pressure for 55 minutes, as recommended by the USDA's Complete Guide to Home Canning. This step is crucial for safety and preserving the squash properly.
6
Post-Processing:
Once the canning process is complete, carefully remove the jars from the canner and let them cool. Listen for the magical sound of lids popping, indicating a proper seal.
Final Touches:
For those dealing with hard water, adding a bit of vinegar to the water in the canner can help prevent clouding on the jars. Once cooled, check the seals, and store your beautifully canned butternut squash in a cool, dark place.
Conclusion:
Canning butternut squash is a rewarding process that provides you with delicious, ready-to-eat squash for the winter. Whether you're new to canning or a seasoned pro, I hope this inspires you to add butternut squash to your canning repertoire. Enjoy the process and the wonderful results!
Leave a Review
Please log in or register for a new account in order to leave a review.


