How to Can Peaches: A Step-by-Step Guide

peaches
1
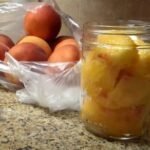
Good morning ,Today, I'm excited to share my process for canning peaches. Although I usually raise or forage my fruit, I couldn't resist buying these peaches at $1.48 per pound. Let's dive into the canning process, which includes peeling the peaches, preparing a simple syrup, and canning them for long-term storage.

2
Ingredients and Preparation
Simple Syrup Recipe:
5 cups of water
3 cups of sugar
For today's batch, I doubled the recipe to ensure I have enough syrup for all the peaches.
Steps to Make the Simple Syrup:
Combine 10 cups of water and 6 cups of sugar in a pot.
Turn the heat to low and let the syrup warm up, ensuring all the sugar dissolves completely. The syrup will be clear when ready.
Preparing the Peaches
Steps to Prepare the Peaches:
Peel the Peaches: Use a knife to peel off the skin. Since these are freestone peaches, the skin comes off easily.
Remove the Pits: Cut the peaches in half and remove the pits. The peaches pull apart easily, making this step quick and simple.
Cut the Peaches: Cut the peaches into desired sizes. I found that about one and a half peaches fit perfectly into a wide-mouth pint jar.
Canning Process
Steps for Canning:
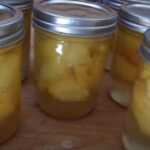
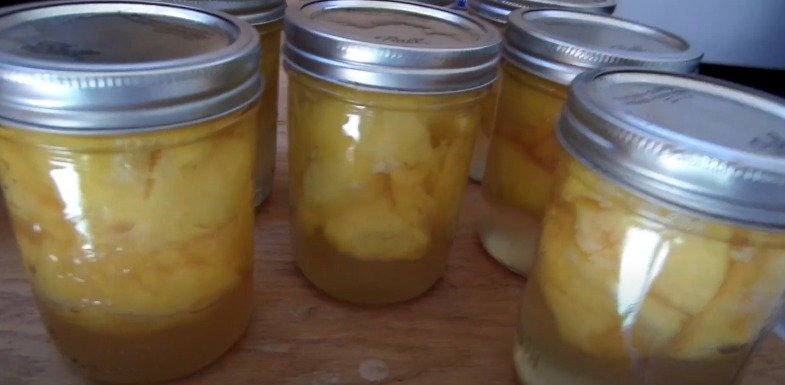
Fill the Jars: Place the cut peaches into the jars, leaving enough room for the syrup.
Add Simple Syrup: Pour the simple syrup over the peaches, ensuring the peaches are fully covered and leaving some headspace.
Remove Air Bubbles: Use a wooden knife to remove any air bubbles from the jars.

3
Clean the Rims: Wipe the rims of the jars to ensure a good seal.
Seal the Jars: Place the lids and rings on the jars and tighten them to fingertip tightness.
Hot Bath Canning
Steps for Hot Bath Canning:
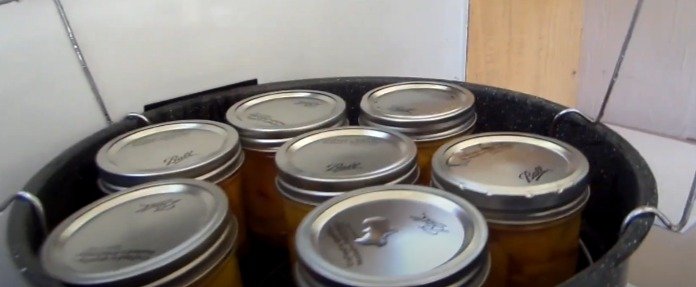
Boil Water: Bring a large pot of water to a boil on a propane stove in your outdoor kitchen. This helps keep your house cool.

4
Process the Jars: Place the jars in the boiling water. Since these peaches are raw-packed, process them for 25 minutes.
Cool the Jars: Once done, carefully remove the jars from the hot water and let them cool. You’ll hear the satisfying sound of the lids sealing as they cool down.
Tips for Success
Freestone Peaches: These are ideal for canning as the skin comes off easily, and the pits are easy to remove.
5
Syrup Options: For a heavier syrup, use a 1:1 ratio of sugar to water, but be aware that this will be very sweet.
Cleanliness: Always ensure your jars, lids, and tools are clean to prevent contamination and ensure a good seal.
Final Thoughts
Canning peaches is a rewarding process that allows you to enjoy the taste of summer all year round. Raw packing makes the process simpler and quicker, and using a medium syrup ensures the peaches aren’t overly sweet. I love using my outdoor kitchen for canning to avoid heating up the house, and the propane stove is perfect for maintaining a steady boil.
Thank you for joining me today! I hope this guide inspires you to try canning your own peaches. Stay tuned for more canning adventures and tips. Happy canning!
Ingredients
peaches
Directions
1
Good morning ,Today, I'm excited to share my process for canning peaches. Although I usually raise or forage my fruit, I couldn't resist buying these peaches at $1.48 per pound. Let's dive into the canning process, which includes peeling the peaches, preparing a simple syrup, and canning them for long-term storage.

2
Ingredients and Preparation
Simple Syrup Recipe:
5 cups of water
3 cups of sugar
For today's batch, I doubled the recipe to ensure I have enough syrup for all the peaches.
Steps to Make the Simple Syrup:
Combine 10 cups of water and 6 cups of sugar in a pot.
Turn the heat to low and let the syrup warm up, ensuring all the sugar dissolves completely. The syrup will be clear when ready.
Preparing the Peaches
Steps to Prepare the Peaches:
Peel the Peaches: Use a knife to peel off the skin. Since these are freestone peaches, the skin comes off easily.
Remove the Pits: Cut the peaches in half and remove the pits. The peaches pull apart easily, making this step quick and simple.
Cut the Peaches: Cut the peaches into desired sizes. I found that about one and a half peaches fit perfectly into a wide-mouth pint jar.
Canning Process
Steps for Canning:
Fill the Jars: Place the cut peaches into the jars, leaving enough room for the syrup.
Add Simple Syrup: Pour the simple syrup over the peaches, ensuring the peaches are fully covered and leaving some headspace.
Remove Air Bubbles: Use a wooden knife to remove any air bubbles from the jars.

3
Clean the Rims: Wipe the rims of the jars to ensure a good seal.
Seal the Jars: Place the lids and rings on the jars and tighten them to fingertip tightness.
Hot Bath Canning
Steps for Hot Bath Canning:
Boil Water: Bring a large pot of water to a boil on a propane stove in your outdoor kitchen. This helps keep your house cool.

4
Process the Jars: Place the jars in the boiling water. Since these peaches are raw-packed, process them for 25 minutes.
Cool the Jars: Once done, carefully remove the jars from the hot water and let them cool. You’ll hear the satisfying sound of the lids sealing as they cool down.
Tips for Success
Freestone Peaches: These are ideal for canning as the skin comes off easily, and the pits are easy to remove.

5
Syrup Options: For a heavier syrup, use a 1:1 ratio of sugar to water, but be aware that this will be very sweet.
Cleanliness: Always ensure your jars, lids, and tools are clean to prevent contamination and ensure a good seal.
Final Thoughts
Canning peaches is a rewarding process that allows you to enjoy the taste of summer all year round. Raw packing makes the process simpler and quicker, and using a medium syrup ensures the peaches aren’t overly sweet. I love using my outdoor kitchen for canning to avoid heating up the house, and the propane stove is perfect for maintaining a steady boil.
Thank you for joining me today! I hope this guide inspires you to try canning your own peaches. Stay tuned for more canning adventures and tips. Happy canning!

Leave a Review
Please log in or register for a new account in order to leave a review.


