How to Can Butter for Long-Term Storage: A Step-by-Step Guide

butter
1
Hey everyone, welcome to Outdoors and Country Living! I'm Leanne, and today I'm going to show you how to can butter for your pantry shelves. In this guide, we'll go through the process step-by-step to ensure you have shelf-stable butter that can last for years. Let's get started!
Materials Needed:
24 boxes of real butter (salted, unsalted, or a combination)
Large stainless steel pot
24 pint jars (clean and ready to be filled)
Lids and bands
Pressure canner
Damp paper towel
Step 1: Preparing the Butter
First, we need to open all the butter sticks. With 24 boxes, this equals 96 sticks, so it might take a while. Place the butter in the large stainless steel pot and begin to melt it slowly over low heat on the stovetop. Stir frequently to ensure the milk solids and fats combine properly and to prevent scorching.
Step 2: Melting the Butter
Continue melting the butter until it is completely liquid. This step is crucial for even canning. Stir often to keep the milk solids and fats blended.

2
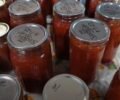
Step 3: Filling the Jars
Once the butter is fully melted, start filling your jars. Leave about an inch of headspace in each jar. Make sure to stir the butter as you fill to ensure the milk solids and fats are evenly distributed.

3
Step 4: Cleaning the Jars
Using a damp paper towel, clean the rim of each jar to ensure a good seal. Apply the lids and bands, tightening them fingertip tight

4
.
Step 5: Pressure Canning
Place the jars in the pressure canner. For our double-decker canner, we can process 18 pints at once. Add 3-4 inches of water to the canner. Process the jars at 10 pounds of pressure for 75 minutes. If you're at a different elevation, refer to your canning guide for the appropriate processing times.
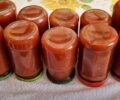
Step 6: Cooling and Storing
After the processing time is complete, allow the canner to cool naturally to zero pressure. Carefully remove the jars and let them sit overnight to cool. You'll notice the milk solids settle at the bottom and the clarified butter on top—this is normal.
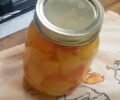
Step 7: Final Steps
The next day, shake the jars to mix the milk solids and butter. Remove the bands and wash the jars with hot soapy water to remove any butter residue. Dry the jars, label them with the date, and store them in your pantry.

5
Tips for Success
Stir frequently during the melting process to avoid scorching.
Ensure the rims are clean before sealing the jars to get a good seal.
Follow the correct pressure and time for your elevation.

6
Conclusion
And there you have it! Beautiful, shelf-stable butter ready to be used whenever you need it. This butter is perfect for homemade bread, biscuits, cornbread, toast, and cooking. Thanks for joining me today. I hope you enjoyed learning how to can butter, and I hope you try it too. Take care, and see you next time!

Ingredients
butter
Directions
1
Hey everyone, welcome to Outdoors and Country Living! I'm Leanne, and today I'm going to show you how to can butter for your pantry shelves. In this guide, we'll go through the process step-by-step to ensure you have shelf-stable butter that can last for years. Let's get started!
Materials Needed:
24 boxes of real butter (salted, unsalted, or a combination)
Large stainless steel pot
24 pint jars (clean and ready to be filled)
Lids and bands
Pressure canner
Damp paper towel
Step 1: Preparing the Butter
First, we need to open all the butter sticks. With 24 boxes, this equals 96 sticks, so it might take a while. Place the butter in the large stainless steel pot and begin to melt it slowly over low heat on the stovetop. Stir frequently to ensure the milk solids and fats combine properly and to prevent scorching.
Step 2: Melting the Butter
Continue melting the butter until it is completely liquid. This step is crucial for even canning. Stir often to keep the milk solids and fats blended.
2
Step 3: Filling the Jars
Once the butter is fully melted, start filling your jars. Leave about an inch of headspace in each jar. Make sure to stir the butter as you fill to ensure the milk solids and fats are evenly distributed.
3
Step 4: Cleaning the Jars
Using a damp paper towel, clean the rim of each jar to ensure a good seal. Apply the lids and bands, tightening them fingertip tight
4
.
Step 5: Pressure Canning
Place the jars in the pressure canner. For our double-decker canner, we can process 18 pints at once. Add 3-4 inches of water to the canner. Process the jars at 10 pounds of pressure for 75 minutes. If you're at a different elevation, refer to your canning guide for the appropriate processing times.
Step 6: Cooling and Storing
After the processing time is complete, allow the canner to cool naturally to zero pressure. Carefully remove the jars and let them sit overnight to cool. You'll notice the milk solids settle at the bottom and the clarified butter on top—this is normal.
Step 7: Final Steps
The next day, shake the jars to mix the milk solids and butter. Remove the bands and wash the jars with hot soapy water to remove any butter residue. Dry the jars, label them with the date, and store them in your pantry.
5
Tips for Success
Stir frequently during the melting process to avoid scorching.
Ensure the rims are clean before sealing the jars to get a good seal.
Follow the correct pressure and time for your elevation.
6
Conclusion
And there you have it! Beautiful, shelf-stable butter ready to be used whenever you need it. This butter is perfect for homemade bread, biscuits, cornbread, toast, and cooking. Thanks for joining me today. I hope you enjoyed learning how to can butter, and I hope you try it too. Take care, and see you next time!
Leave a Review
Please log in or register for a new account in order to leave a review.