A Beginner’s Journey to Pickle Canning: A Step-by-Step Guide

1
Welcome to my chaotic yet thrilling adventure into the world of pickle canning! Today, I'm sharing my very first experience with canning pickles. Join me as I navigate through the process, learning as I go, and sharing every step (and misstep) along the way.
2
Getting Started
Preparing the Jars
First, I selected some wide-mouth jars, perfect for pickles. After thoroughly washing them, I placed the jars on a cookie sheet with a cotton cloth and put them in the oven at 225°F for about 20-30 minutes to sterilize them. Since I'm using the water bath canning method, sterilization is crucial.
3
Prepping the Pickles
I washed the cucumbers with a vegetable brush under cool water to remove any dirt. Once cleaned, I placed them in a strainer to drain off excess water. For this batch, I decided to slice the cucumbers into hamburger chips, as they are a favorite in my household.
Making the Pickling Solution
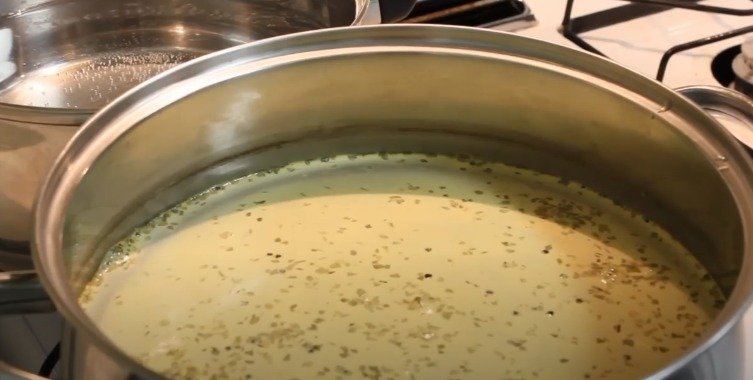
Using a pre-made pickling mix with pickle crisp, I ensured my pickles would stay crunchy. I added a few peppercorns for extra flavor and prepared a quadruple batch of the pickling solution to accommodate the large number of cucumbers I had.
4
Slicing and Packing
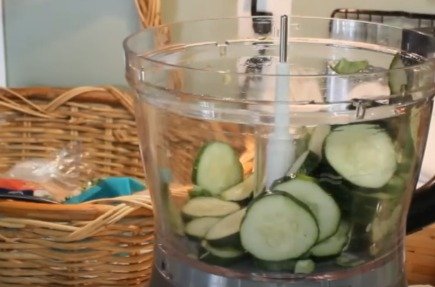
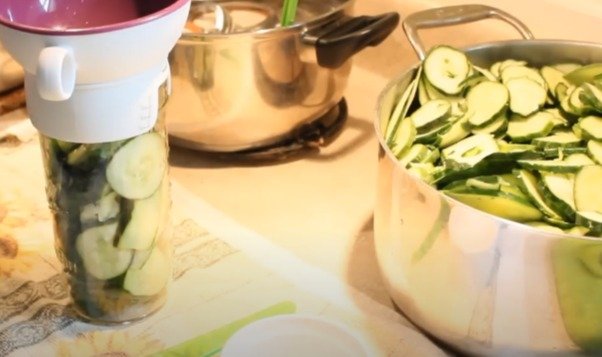
Using my KitchenAid food processor, I sliced the cucumbers evenly. Despite some initial hiccups, like the cucumbers going in sideways, I managed to get perfect slices eventually. I then took my sterilized jars out of the oven, one at a time, to keep them hot and started packing them with the cucumber slices.
Adding the Pickling Solution
With my jars packed, I poured the hot pickling solution over the cucumbers, ensuring to leave about a quarter-inch of headspace. Using a funnel, I avoided making a mess and kept the rims of the jars clean. I then wiped the rims with vinegar to ensure a good seal.
Processing the Jars
I placed the filled jars in my canner, ensuring they were covered with water. Once the water reached a rapid boil, I processed the jars for 15 minutes. After processing, I carefully removed the jars and set them aside to cool.
The Results
After hours of work amidst the chaos of a noisy household, I successfully canned 17 and a half pints of pickles. The satisfaction of seeing those beautiful jars filled with homemade pickles is unmatched.
Final Thoughts
Canning pickles for the first time was a mix of excitement and nerves. Despite the challenges and the learning curve, the end result was worth every bit of effort. If you're new to canning, don't be afraid to dive in and give it a try. Remember, I'm right there with you in spirit, navigating through the process together.

5
Next Steps
With the pickles done, my next project will be canning green beans and zucchini. Stay tuned for more canning adventures, and if you’re looking for an easy beginner project, keep an eye out for my upcoming grape jelly tutorial.
Conclusion
Canning is not just about preserving food; it's about the sense of accomplishment and empowerment that comes with making your own food. So, gather your supplies, embrace the chaos, and start your own canning journey today. Happy canning!

Ingredients
Directions
1
Welcome to my chaotic yet thrilling adventure into the world of pickle canning! Today, I'm sharing my very first experience with canning pickles. Join me as I navigate through the process, learning as I go, and sharing every step (and misstep) along the way.

2
Getting Started
Preparing the Jars
First, I selected some wide-mouth jars, perfect for pickles. After thoroughly washing them, I placed the jars on a cookie sheet with a cotton cloth and put them in the oven at 225°F for about 20-30 minutes to sterilize them. Since I'm using the water bath canning method, sterilization is crucial.

3
Prepping the Pickles
I washed the cucumbers with a vegetable brush under cool water to remove any dirt. Once cleaned, I placed them in a strainer to drain off excess water. For this batch, I decided to slice the cucumbers into hamburger chips, as they are a favorite in my household.
Making the Pickling Solution
Using a pre-made pickling mix with pickle crisp, I ensured my pickles would stay crunchy. I added a few peppercorns for extra flavor and prepared a quadruple batch of the pickling solution to accommodate the large number of cucumbers I had.

4
Slicing and Packing
Using my KitchenAid food processor, I sliced the cucumbers evenly. Despite some initial hiccups, like the cucumbers going in sideways, I managed to get perfect slices eventually. I then took my sterilized jars out of the oven, one at a time, to keep them hot and started packing them with the cucumber slices.
Adding the Pickling Solution
With my jars packed, I poured the hot pickling solution over the cucumbers, ensuring to leave about a quarter-inch of headspace. Using a funnel, I avoided making a mess and kept the rims of the jars clean. I then wiped the rims with vinegar to ensure a good seal.
Processing the Jars
I placed the filled jars in my canner, ensuring they were covered with water. Once the water reached a rapid boil, I processed the jars for 15 minutes. After processing, I carefully removed the jars and set them aside to cool.
The Results
After hours of work amidst the chaos of a noisy household, I successfully canned 17 and a half pints of pickles. The satisfaction of seeing those beautiful jars filled with homemade pickles is unmatched.
Final Thoughts
Canning pickles for the first time was a mix of excitement and nerves. Despite the challenges and the learning curve, the end result was worth every bit of effort. If you're new to canning, don't be afraid to dive in and give it a try. Remember, I'm right there with you in spirit, navigating through the process together.

5
Next Steps
With the pickles done, my next project will be canning green beans and zucchini. Stay tuned for more canning adventures, and if you’re looking for an easy beginner project, keep an eye out for my upcoming grape jelly tutorial.
Conclusion
Canning is not just about preserving food; it's about the sense of accomplishment and empowerment that comes with making your own food. So, gather your supplies, embrace the chaos, and start your own canning journey today. Happy canning!

Leave a Review
Please log in or register for a new account in order to leave a review.

