Step-by-Step Guide to Canning Potatoes at Home

10.50 lbs potatoes
7 l water
1 tsp salt
1
Welcome back to the homestead! Today, we're diving into the wonderful world of canning potatoes. This year, Nanny grew a bountiful crop of potatoes, and after letting them cure for a while, it's time to preserve them.
Why Let Potatoes Cure?
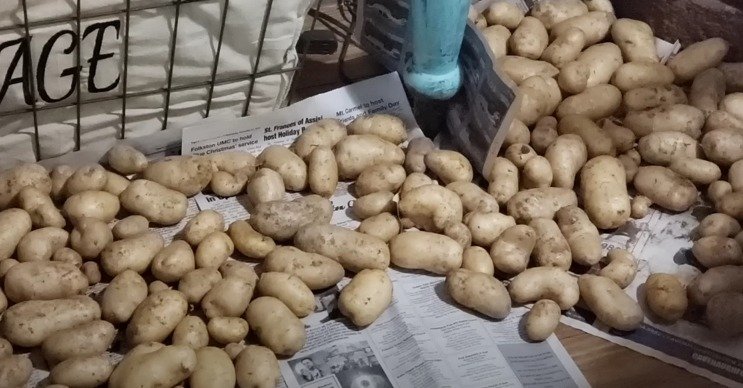
Curing potatoes is a crucial step before canning. When you first dig them up, both regular and sweet potatoes might be a bit green and not as sweet. Allowing them to cure enhances their flavor and prepares them for long-term storage. Even store-bought potatoes can benefit from a brief curing period to improve their taste and reduce sprouting.
2
Preparing Your Potatoes
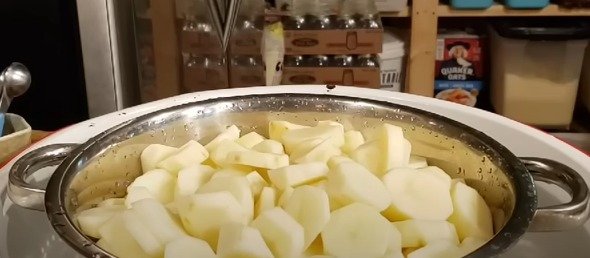
Peel and Cut: Start by peeling and cutting your potatoes. For this batch, we have about ten and a half pounds, which should yield around seven quarts.
Soak in Water: After peeling and cutting, keep the potatoes in water to prevent them from browning.

3
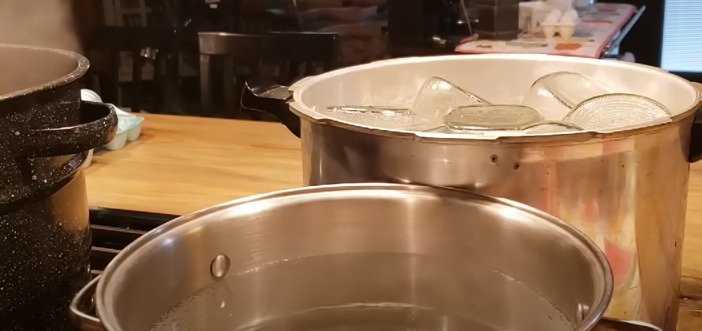
Setting Up for Canning
Sterilizing Jars and Equipment
Pressure Cooker: Place seven quart jars in your pressure cooker with three quarts of water. Heat them to sterilize.
Boiling Water: Have a pot of boiling water ready to use once the potatoes are in the jars.

4
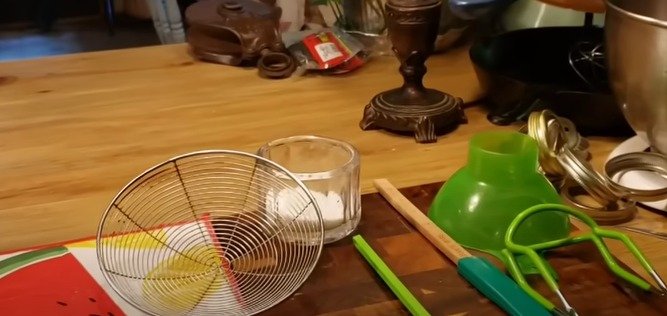
Utensils: Gather your canning utensils, including a debubbler, jar lifter, canning salt, and a funnel.
Blanching the Potatoes
5
Blanching the Potatoes
Boil Potatoes: Add your potatoes to a large pot of boiling water. Boil for about 10 minutes. This step helps reduce the starch content, which is crucial for achieving the best canning results.

6
Drain and Cool: After boiling, drain the potatoes and let them cool slightly.
Filling the Jars

7
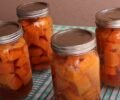
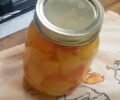
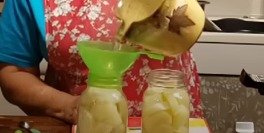
Add Potatoes: Carefully fill the hot, sterilized jars with the blanched potatoes. You can cut them into chunks or slices, depending on your preference.
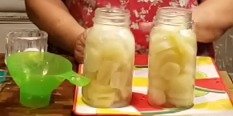
8
Canning Salt: Add one teaspoon of canning salt to each quart jar (or half a teaspoon for pint jars).
Add Water: Pour boiling water into the jars, leaving about an inch of headspace at the top.
Debubble: Use a debubbler to remove any air bubbles from the jars.
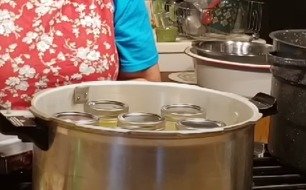
Sealing and Processing
Clean the Rims: Wipe the rims of the jars with vinegar to ensure they are clean and will seal properly.
Add Lids and Rings: Place the lids on the jars and screw on the rings until they are finger-tight.
9
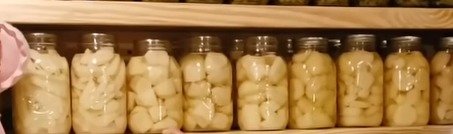
Process in Pressure Cooker: Place the jars in the pressure cooker. Once it reaches the desired pressure (10-11 pounds), process quart jars for 40 minutes and pint jars for 35 minutes.
Tips for Perfect Pressure Canning
Medium Burner: Use a medium burner to bring the pressure cooker up to pressure gradually. This helps maintain the correct pressure without overshooting.
Adjust Heat: Once the desired pressure is reached, adjust the heat to keep it steady.

10
Final Steps
After processing, let the pressure cooker cool down naturally before removing the jars. Check the seals once the jars have cooled. If sealed correctly, store them in a cool, dark place. If not, refrigerate and use those potatoes first.
Having home-canned potatoes on your shelf is incredibly convenient and a great way to preserve your harvest. They are ready to use in various recipes and are a fantastic time-saver. Happy canning!
Stay tuned for more canning recipes and tips. Upcoming videos will feature chow chow, zucchini relish, and much more. Happy homesteading, and God bless!


Ingredients
10.50 lbs potatoes
7 l water
1 tsp salt
Directions
1
Welcome back to the homestead! Today, we're diving into the wonderful world of canning potatoes. This year, Nanny grew a bountiful crop of potatoes, and after letting them cure for a while, it's time to preserve them.
Why Let Potatoes Cure?
Curing potatoes is a crucial step before canning. When you first dig them up, both regular and sweet potatoes might be a bit green and not as sweet. Allowing them to cure enhances their flavor and prepares them for long-term storage. Even store-bought potatoes can benefit from a brief curing period to improve their taste and reduce sprouting.
2
Preparing Your Potatoes
Peel and Cut: Start by peeling and cutting your potatoes. For this batch, we have about ten and a half pounds, which should yield around seven quarts.
Soak in Water: After peeling and cutting, keep the potatoes in water to prevent them from browning.
3
Setting Up for Canning
Sterilizing Jars and Equipment
Pressure Cooker: Place seven quart jars in your pressure cooker with three quarts of water. Heat them to sterilize.
Boiling Water: Have a pot of boiling water ready to use once the potatoes are in the jars.
4
Utensils: Gather your canning utensils, including a debubbler, jar lifter, canning salt, and a funnel.
Blanching the Potatoes
5
Blanching the Potatoes
Boil Potatoes: Add your potatoes to a large pot of boiling water. Boil for about 10 minutes. This step helps reduce the starch content, which is crucial for achieving the best canning results.
6
Drain and Cool: After boiling, drain the potatoes and let them cool slightly.
Filling the Jars
7
Add Potatoes: Carefully fill the hot, sterilized jars with the blanched potatoes. You can cut them into chunks or slices, depending on your preference.
8
Canning Salt: Add one teaspoon of canning salt to each quart jar (or half a teaspoon for pint jars).
Add Water: Pour boiling water into the jars, leaving about an inch of headspace at the top.
Debubble: Use a debubbler to remove any air bubbles from the jars.
Sealing and Processing
Clean the Rims: Wipe the rims of the jars with vinegar to ensure they are clean and will seal properly.
Add Lids and Rings: Place the lids on the jars and screw on the rings until they are finger-tight.
9
Process in Pressure Cooker: Place the jars in the pressure cooker. Once it reaches the desired pressure (10-11 pounds), process quart jars for 40 minutes and pint jars for 35 minutes.
Tips for Perfect Pressure Canning
Medium Burner: Use a medium burner to bring the pressure cooker up to pressure gradually. This helps maintain the correct pressure without overshooting.
Adjust Heat: Once the desired pressure is reached, adjust the heat to keep it steady.
10
Final Steps
After processing, let the pressure cooker cool down naturally before removing the jars. Check the seals once the jars have cooled. If sealed correctly, store them in a cool, dark place. If not, refrigerate and use those potatoes first.
Having home-canned potatoes on your shelf is incredibly convenient and a great way to preserve your harvest. They are ready to use in various recipes and are a fantastic time-saver. Happy canning!
Stay tuned for more canning recipes and tips. Upcoming videos will feature chow chow, zucchini relish, and much more. Happy homesteading, and God bless!
Leave a Review
Please log in or register for a new account in order to leave a review.