Mastering Pressure Canning: Signature Chili Recipe from Great Lakes Prepping
1
Great Lakes Prepping here with another exciting pressure canning tutorial! Today, we're making my signature chili recipe from scratch, using fresh ingredients to create a delicious, shelf-stable chili that you can enjoy all year long. This recipe is slightly modified to work perfectly for pressure canning, ensuring the best results.
2
Ingredients
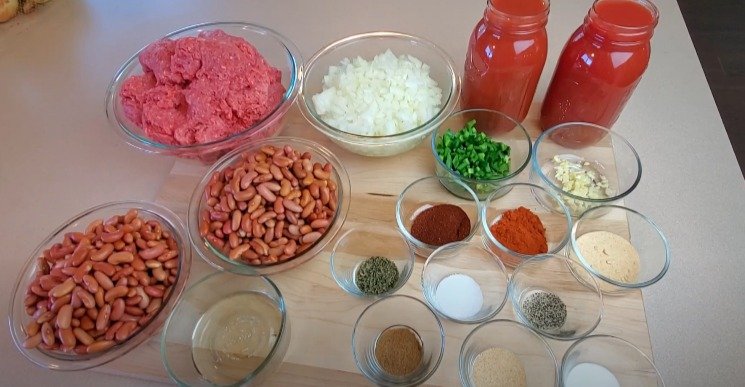
Ground Beef: We're using 80/20 ground beef today, but you can use ground sirloin or any ground meat you prefer.
Yellow Onion: Five cups of chopped yellow onions.
Tomato Juice: 69 ounces of tomato juice. You can use store-bought or homemade.
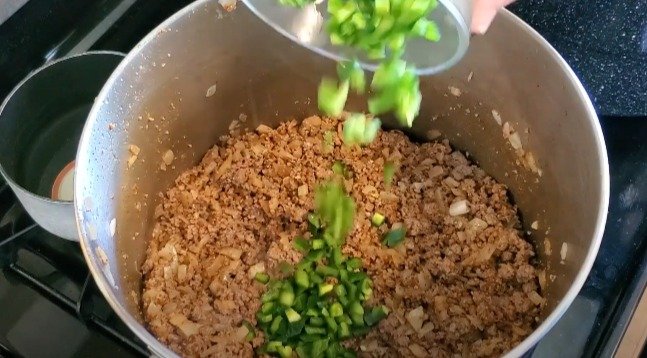
Fresh Jalapeno: Two diced jalapenos.
Garlic: Six cloves, minced.
Red Kidney Beans: 1.5 pounds of dried light red kidney beans, soaked overnight.
3
Olive Oil: For browning the meat.
Chili Seasonings: Chili powder, cayenne pepper, onion powder, garlic powder, cumin, dried parsley, salt, black pepper, and a little white sugar.
Preparation
Soak the Beans: Start by soaking your dried kidney beans overnight. Rinse and strain them before use.
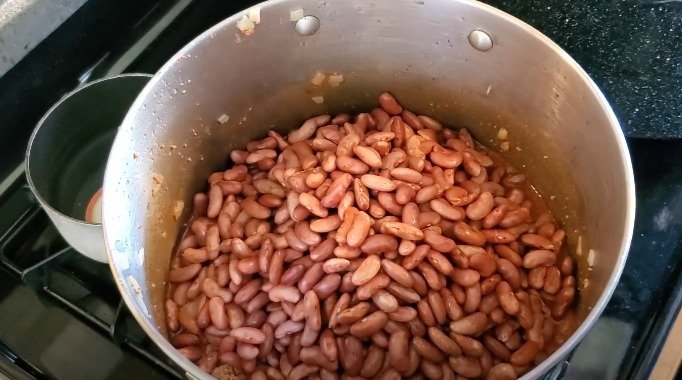
Simmer the Beans: Place the soaked beans in a medium-sized stock pot, cover with fresh water, bring to a boil, reduce the heat, and simmer for 20 minutes. Drain and set aside.
Sterilize Jars: Fill your hot water bath canner with water and sterilize your quart jars, keeping them warm until ready for use.
Cooking the Chili
4
Brown the Meat: Heat olive oil in a large pot, brown three pounds of ground beef until halfway cooked, then add the onions and garlic. Continue cooking until the meat is fully browned.
Mix the Seasonings: Combine all your chili seasonings in a bowl and mix well.
Combine Ingredients: Add the spice mix to the browned meat, followed by the jalapenos and tomato juice. Stir well.
Add the Beans: Incorporate the simmered kidney beans into the chili mixture. Bring to a low boil, reduce the heat, and simmer for 15-20 minutes to let the flavors meld together.
Canning Process
Prepare the Jars: Using a jar lifter, carefully remove the hot jars from the canner and set them on the counter. Pour the hot chili into the jars, leaving about one inch of headspace.

5
De-Bubble and Clean: Use a de-bubbler tool to remove any trapped air bubbles. Wipe the rims of the jars with a damp paper towel to ensure a clean seal.
Seal the Jars: Place sanitized lids on the jars and screw on the metal rings until they are finger-tight.
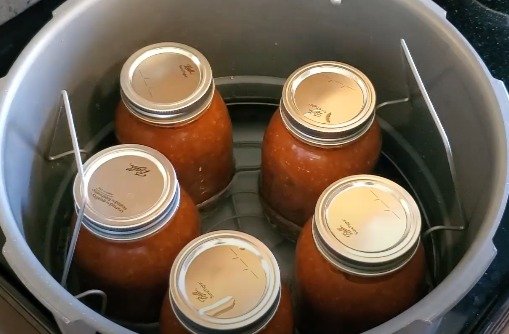
Pressure Canning: Add three quarts of water to your pressure canner (check your model’s instructions for specific amounts). Place the jars in the canner, ensuring they don’t touch each other or the canner’s sides. Secure the lid.
Processing
Vent the Canner: Turn the heat to high and let the canner vent for 10 minutes. Place the weighted pressure regulator on the steam spout and adjust the heat to maintain a gentle rocking motion.
Process the Chili: Set your timer for 90 minutes for quart jars (75 minutes for pint jars). After the processing time, turn off the heat and let the canner cool down naturally. Ensure the pressure pin has dropped before opening the lid.
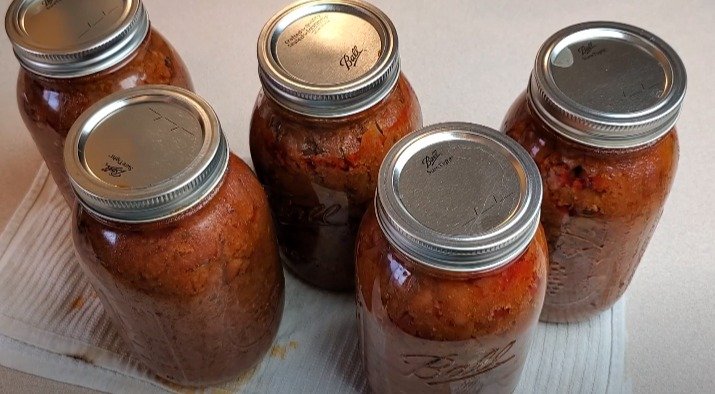
Cool and Store: Carefully remove the jars and place them on a towel to cool. Listen for the satisfying pop of the lids as they seal. If any jars don’t seal properly, refrigerate and consume within a few days.
6
Conclusion
Congratulations, you've successfully pressure-canned your own batch of signature chili! This process ensures you have a delicious, ready-to-eat meal that’s shelf-stable for months. As always, remember to follow safety guidelines and familiarize yourself with your pressure canner’s instructions for the best results.
Until next time, happy canning!

Ingredients
Directions
1
Great Lakes Prepping here with another exciting pressure canning tutorial! Today, we're making my signature chili recipe from scratch, using fresh ingredients to create a delicious, shelf-stable chili that you can enjoy all year long. This recipe is slightly modified to work perfectly for pressure canning, ensuring the best results.

2
Ingredients
Ground Beef: We're using 80/20 ground beef today, but you can use ground sirloin or any ground meat you prefer.
Yellow Onion: Five cups of chopped yellow onions.
Tomato Juice: 69 ounces of tomato juice. You can use store-bought or homemade.
Fresh Jalapeno: Two diced jalapenos.
Garlic: Six cloves, minced.
Red Kidney Beans: 1.5 pounds of dried light red kidney beans, soaked overnight.

3
Olive Oil: For browning the meat.
Chili Seasonings: Chili powder, cayenne pepper, onion powder, garlic powder, cumin, dried parsley, salt, black pepper, and a little white sugar.
Preparation
Soak the Beans: Start by soaking your dried kidney beans overnight. Rinse and strain them before use.
Simmer the Beans: Place the soaked beans in a medium-sized stock pot, cover with fresh water, bring to a boil, reduce the heat, and simmer for 20 minutes. Drain and set aside.
Sterilize Jars: Fill your hot water bath canner with water and sterilize your quart jars, keeping them warm until ready for use.
Cooking the Chili

4
Brown the Meat: Heat olive oil in a large pot, brown three pounds of ground beef until halfway cooked, then add the onions and garlic. Continue cooking until the meat is fully browned.
Mix the Seasonings: Combine all your chili seasonings in a bowl and mix well.
Combine Ingredients: Add the spice mix to the browned meat, followed by the jalapenos and tomato juice. Stir well.
Add the Beans: Incorporate the simmered kidney beans into the chili mixture. Bring to a low boil, reduce the heat, and simmer for 15-20 minutes to let the flavors meld together.
Canning Process
Prepare the Jars: Using a jar lifter, carefully remove the hot jars from the canner and set them on the counter. Pour the hot chili into the jars, leaving about one inch of headspace.

5
De-Bubble and Clean: Use a de-bubbler tool to remove any trapped air bubbles. Wipe the rims of the jars with a damp paper towel to ensure a clean seal.
Seal the Jars: Place sanitized lids on the jars and screw on the metal rings until they are finger-tight.
Pressure Canning: Add three quarts of water to your pressure canner (check your model’s instructions for specific amounts). Place the jars in the canner, ensuring they don’t touch each other or the canner’s sides. Secure the lid.
Processing
Vent the Canner: Turn the heat to high and let the canner vent for 10 minutes. Place the weighted pressure regulator on the steam spout and adjust the heat to maintain a gentle rocking motion.
Process the Chili: Set your timer for 90 minutes for quart jars (75 minutes for pint jars). After the processing time, turn off the heat and let the canner cool down naturally. Ensure the pressure pin has dropped before opening the lid.
Cool and Store: Carefully remove the jars and place them on a towel to cool. Listen for the satisfying pop of the lids as they seal. If any jars don’t seal properly, refrigerate and consume within a few days.

6
Conclusion
Congratulations, you've successfully pressure-canned your own batch of signature chili! This process ensures you have a delicious, ready-to-eat meal that’s shelf-stable for months. As always, remember to follow safety guidelines and familiarize yourself with your pressure canner’s instructions for the best results.
Until next time, happy canning!

Leave a Review
Please log in or register for a new account in order to leave a review.

