Making Delicious Grape Jelly at Home: A Simple Guide for Beginners

1
Welcome to our kitchen! Today, we're diving into the world of homemade grape jelly, a perfect recipe for beginners. This was the very first recipe I ever tried in canning, and it's incredibly straightforward. So, let's get started!

2
Ingredients You'll Need:
6 cups of 100% pure grape juice (no sugar added)
7 cups of sugar (for classic pectin) or 4.5 cups of sugar (for low/no sugar pectin)
12 tablespoons of pectin
1 tablespoon of butter
Step-by-Step Instructions:
Preparing the Juice
Heat the Juice: Pour 6 cups of grape juice into a large pot. Use a pot that heats evenly; my favorite is an Emeril Lagasse pot.
Add Pectin: Sprinkle 12 tablespoons of pectin over the juice. This helps prevent clumping. Stir well to combine.
Boiling and Adding Sugar
Heat the Mixture: Stir the mixture continuously until it comes to a boil. Add 1 tablespoon of butter to reduce foaming.

3
Boil Rapidly: Once the mixture reaches a rolling boil (a boil that cannot be stirred down), add 7 cups of sugar. Keep stirring to dissolve all the sugar and eliminate any lumps.
Boil Again: Bring the mixture back to a rolling boil, stirring constantly. Boil for one minute.
Finishing Up
Remove from Heat: After boiling, remove the pot from heat.
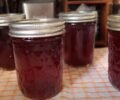
Prepare Jars: Pour the hot jelly into sterilized jars, leaving about a quarter-inch headspace. Wipe the rims clean before sealing.
Canning Process
Process the Jars: Place the jars in a boiling water canner for 5 minutes (if using pint jars, process for 10 minutes).
Cool and Store: Remove jars from the canner and let them cool. Ensure the lids seal properly before storing.

4
Tips and Tricks
Foam Reduction: The tablespoon of butter helps minimize foam, making your jelly clearer and more attractive.
Jar Sizes: I like using various jar sizes, from half-pints for sharing with friends to larger pints for family use.
Vintage Jars: If you find old mason jars, use them! They're charming and often more durable than new ones.
Enjoy Your Homemade Grape Jelly!
Making grape jelly at home is not only cost-effective but also fun and rewarding. You'll have delicious jelly to enjoy on toast, in PB&J sandwiches, or as a gift for friends and family.
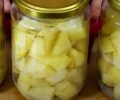
Stay tuned for more canning recipes, including apples and onions. Happy canning!

Ingredients
Directions
1
Welcome to our kitchen! Today, we're diving into the world of homemade grape jelly, a perfect recipe for beginners. This was the very first recipe I ever tried in canning, and it's incredibly straightforward. So, let's get started!
2
Ingredients You'll Need:
6 cups of 100% pure grape juice (no sugar added)
7 cups of sugar (for classic pectin) or 4.5 cups of sugar (for low/no sugar pectin)
12 tablespoons of pectin
1 tablespoon of butter
Step-by-Step Instructions:
Preparing the Juice
Heat the Juice: Pour 6 cups of grape juice into a large pot. Use a pot that heats evenly; my favorite is an Emeril Lagasse pot.
Add Pectin: Sprinkle 12 tablespoons of pectin over the juice. This helps prevent clumping. Stir well to combine.
Boiling and Adding Sugar
Heat the Mixture: Stir the mixture continuously until it comes to a boil. Add 1 tablespoon of butter to reduce foaming.
3
Boil Rapidly: Once the mixture reaches a rolling boil (a boil that cannot be stirred down), add 7 cups of sugar. Keep stirring to dissolve all the sugar and eliminate any lumps.
Boil Again: Bring the mixture back to a rolling boil, stirring constantly. Boil for one minute.
Finishing Up
Remove from Heat: After boiling, remove the pot from heat.
Prepare Jars: Pour the hot jelly into sterilized jars, leaving about a quarter-inch headspace. Wipe the rims clean before sealing.
Canning Process
Process the Jars: Place the jars in a boiling water canner for 5 minutes (if using pint jars, process for 10 minutes).
Cool and Store: Remove jars from the canner and let them cool. Ensure the lids seal properly before storing.
4
Tips and Tricks
Foam Reduction: The tablespoon of butter helps minimize foam, making your jelly clearer and more attractive.
Jar Sizes: I like using various jar sizes, from half-pints for sharing with friends to larger pints for family use.
Vintage Jars: If you find old mason jars, use them! They're charming and often more durable than new ones.
Enjoy Your Homemade Grape Jelly!
Making grape jelly at home is not only cost-effective but also fun and rewarding. You'll have delicious jelly to enjoy on toast, in PB&J sandwiches, or as a gift for friends and family.
Stay tuned for more canning recipes, including apples and onions. Happy canning!
Leave a Review
Please log in or register for a new account in order to leave a review.