How to Make Kosher Dill Pickles with Mrs. Wages

1
Welcome back to Linda's Pantry! Today, we're wrapping up Mrs. Wages Week with a delicious recipe for kosher dill pickles. Making these pickles is incredibly simple, and I'm excited to share the process with you.
Preparing the Cucumbers
First, gather your cucumbers. You’ll want to cut off the blossom end, as it contains an enzyme that can make your pickles soft. We want crisp pickles, so be sure to trim that end off. If the other end looks a bit funky, trim that off too.
Sterilizing the Jars
Your jars need to be hot and ready for canning. Make sure they are sterilized properly to ensure the longevity of your pickles. Once your jars are ready, you can start packing your cucumbers into them.
Making the Brine
In a pot, combine the following:
7 1/3 cups of water
Mrs. Wages kosher dill pickle mix
3 1/3 cups of 5% white vinegar
Heat this mixture until it’s dissolved and comes to a boil. This brine is crucial for giving your pickles that authentic kosher dill flavor.
Packing the Jars
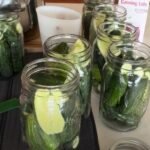
As you pack your cucumbers into the jars, leave about half an inch of headspace. This allows room for the brine and ensures a proper seal. Once your cucumbers are packed, pour the hot brine over them, filling each jar while maintaining the headspace.

2
Sealing the Jars
Use a vinegar-soaked paper towel to wipe the rims of the jars, ensuring they are clean for a good seal. Place the lids on the jars, which should be simmering in hot water to soften the seal.
Processing the Pickles
You can use either a steam canner or a water bath canner for this step. For a steam canner, place the jars inside, ensuring the vent blows steam out to avoid damage to your cabinets. Once the canner reaches the correct pressure (as indicated by the dial), process the jars for 15 minutes.
If using a water bath canner, make sure the jars are covered by 1-2 inches of water. Once it reaches a rolling boil, process for 15 minutes.
3
Cooling the Jars
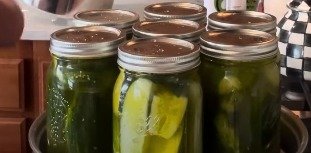
After processing, turn off the heat and let the jars sit in the canner for a bit to acclimate. This helps prevent siphoning, where the brine might be pulled out of the jars due to rapid temperature change. Once the jars have cooled slightly, remove them and let them rest on a towel.
Checking the Seals
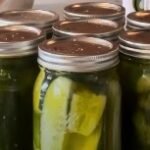
As the jars cool, you should hear the lids pop, indicating a good seal. Sometimes, the lids may take a little longer to seal, especially with the Four Jars brand. Don’t worry if they take a bit more time than you're used to.
Enjoying Your Pickles
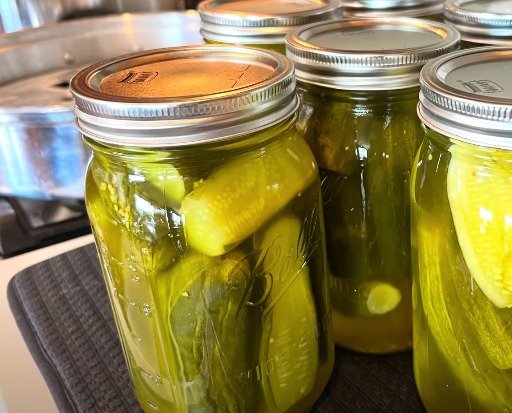
Once your pickles have cooled and sealed properly, store them in a cool, dark place. These delicious kosher dill pickles will be ready to enjoy after sitting for a few weeks to develop their full flavor.
Happy canning!
Ingredients
Directions
1
Welcome back to Linda's Pantry! Today, we're wrapping up Mrs. Wages Week with a delicious recipe for kosher dill pickles. Making these pickles is incredibly simple, and I'm excited to share the process with you.
Preparing the Cucumbers
First, gather your cucumbers. You’ll want to cut off the blossom end, as it contains an enzyme that can make your pickles soft. We want crisp pickles, so be sure to trim that end off. If the other end looks a bit funky, trim that off too.
Sterilizing the Jars
Your jars need to be hot and ready for canning. Make sure they are sterilized properly to ensure the longevity of your pickles. Once your jars are ready, you can start packing your cucumbers into them.
Making the Brine
In a pot, combine the following:
7 1/3 cups of water
Mrs. Wages kosher dill pickle mix
3 1/3 cups of 5% white vinegar
Heat this mixture until it’s dissolved and comes to a boil. This brine is crucial for giving your pickles that authentic kosher dill flavor.
Packing the Jars
As you pack your cucumbers into the jars, leave about half an inch of headspace. This allows room for the brine and ensures a proper seal. Once your cucumbers are packed, pour the hot brine over them, filling each jar while maintaining the headspace.

2
Sealing the Jars
Use a vinegar-soaked paper towel to wipe the rims of the jars, ensuring they are clean for a good seal. Place the lids on the jars, which should be simmering in hot water to soften the seal.
Processing the Pickles
You can use either a steam canner or a water bath canner for this step. For a steam canner, place the jars inside, ensuring the vent blows steam out to avoid damage to your cabinets. Once the canner reaches the correct pressure (as indicated by the dial), process the jars for 15 minutes.
If using a water bath canner, make sure the jars are covered by 1-2 inches of water. Once it reaches a rolling boil, process for 15 minutes.

3
Cooling the Jars
After processing, turn off the heat and let the jars sit in the canner for a bit to acclimate. This helps prevent siphoning, where the brine might be pulled out of the jars due to rapid temperature change. Once the jars have cooled slightly, remove them and let them rest on a towel.
Checking the Seals
As the jars cool, you should hear the lids pop, indicating a good seal. Sometimes, the lids may take a little longer to seal, especially with the Four Jars brand. Don’t worry if they take a bit more time than you're used to.
Enjoying Your Pickles
Once your pickles have cooled and sealed properly, store them in a cool, dark place. These delicious kosher dill pickles will be ready to enjoy after sitting for a few weeks to develop their full flavor.
Happy canning!

Leave a Review
Please log in or register for a new account in order to leave a review.

