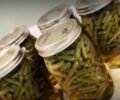
How to Ferment Garlic: A Step-by-Step Guide

AuthorKawther
DifficultyBeginnerCategory
Yields1 Serving
 garlic
1

Fermenting garlic is a great way to preserve it and enhance its health benefits. If you have hardneck garlic that doesn’t store as long as softneck varieties, fermenting can be an excellent solution. In this guide, we’ll walk you through the process of fermenting garlic, from separating the cloves to storing the finished product.

2

Why Ferment Garlic?
Fermenting garlic not only helps in preserving it but also enhances its nutritional value. Raw garlic is known for its health benefits, but many people find it too spicy or harsh to eat raw. Fermentation mellows the flavor while retaining the beneficial enzymes and nutrients. Additionally, fermented garlic is easier to digest and can improve digestive health.

Ingredients and Supplies
Garlic Cloves: Separated and peeled.
Salt: Kosher salt or any coarse salt.
Water: Spring water or tap water.
Pint-Sized Glass Jars: Clean and sterilized.
Lids: Loose-fitting to allow gases to escape.
Step-by-Step Instructions
Step 1: Separate and Peel the Garlic Cloves
Separate the Cloves: Break apart the garlic heads and separate the cloves, leaving the skins on.
Peel the Cloves: You can use a shaking method by placing the cloves in a jar and shaking vigorously to remove the skins. Alternatively, peel each clove by hand.
Step 2: Prepare the Jars
Clean the Jars: Ensure your glass jars are clean and sterilized.
Fill the Jars: Place the peeled garlic cloves into the jars, leaving some headspace.
Step 3: Add the Brine
Salt Solution: Add a full tablespoon of kosher salt to each pint-sized jar.
Add Water: Pour water into the jars, covering the garlic cloves. Use spring water or tap water.
Step 4: Fermenting Process
Loosely Fit the Lids: Place the lids on the jars but do not seal them tightly. The garlic needs to breathe during fermentation.

3

Store in a Cool, Dark Place: Keep the jars in a cool, dark place away from direct sunlight. A pantry or cupboard works well.
Step 5: Wait and Monitor
Fermentation Period: Let the garlic ferment for about a month. During this time, the natural lactobacilli in the air will convert the sugars into lactic acid, preserving the garlic.
Check for Bubbles: You may notice some bubbling, which is a sign of fermentation.
Step 6: Store the Finished Product
Refrigerate: After the fermentation period, move the jars to the refrigerator to halt the fermentation process. Fermented garlic can be stored in the fridge for several months.

4

Tips for Successful Fermentation
Avoid Direct Sunlight: Keep the fermenting garlic out of direct sunlight to maintain a consistent temperature.
Check for Spoilage: If any cloves appear moldy or have an off smell, discard them.
Use Loose Lids: Ensure the lids are loose enough to allow gases to escape but tight enough to keep out contaminants.
Health Benefits of Fermented Garlic
Enhanced Nutrients: Fermentation preserves the enzymes and nutrients in raw garlic

5

.
Improved Digestibility: The fermentation process makes garlic easier to digest.
Probiotic Properties: Fermented garlic contains beneficial bacteria that can aid in digestion.
Final Thoughts
Fermenting garlic is a simple and effective way to preserve its health benefits while making it more palatable. Whether you’re new to fermentation or an experienced home preserver, this method is a great way to extend the life of your garlic harvest. Give it a try and enjoy the delicious, nutritious results!

Ingredients

 garlic

Directions

1

Fermenting garlic is a great way to preserve it and enhance its health benefits. If you have hardneck garlic that doesn’t store as long as softneck varieties, fermenting can be an excellent solution. In this guide, we’ll walk you through the process of fermenting garlic, from separating the cloves to storing the finished product.

2

Why Ferment Garlic?
Fermenting garlic not only helps in preserving it but also enhances its nutritional value. Raw garlic is known for its health benefits, but many people find it too spicy or harsh to eat raw. Fermentation mellows the flavor while retaining the beneficial enzymes and nutrients. Additionally, fermented garlic is easier to digest and can improve digestive health.

Ingredients and Supplies
Garlic Cloves: Separated and peeled.
Salt: Kosher salt or any coarse salt.
Water: Spring water or tap water.
Pint-Sized Glass Jars: Clean and sterilized.
Lids: Loose-fitting to allow gases to escape.
Step-by-Step Instructions
Step 1: Separate and Peel the Garlic Cloves
Separate the Cloves: Break apart the garlic heads and separate the cloves, leaving the skins on.
Peel the Cloves: You can use a shaking method by placing the cloves in a jar and shaking vigorously to remove the skins. Alternatively, peel each clove by hand.
Step 2: Prepare the Jars
Clean the Jars: Ensure your glass jars are clean and sterilized.
Fill the Jars: Place the peeled garlic cloves into the jars, leaving some headspace.
Step 3: Add the Brine
Salt Solution: Add a full tablespoon of kosher salt to each pint-sized jar.
Add Water: Pour water into the jars, covering the garlic cloves. Use spring water or tap water.
Step 4: Fermenting Process
Loosely Fit the Lids: Place the lids on the jars but do not seal them tightly. The garlic needs to breathe during fermentation.

3

Store in a Cool, Dark Place: Keep the jars in a cool, dark place away from direct sunlight. A pantry or cupboard works well.
Step 5: Wait and Monitor
Fermentation Period: Let the garlic ferment for about a month. During this time, the natural lactobacilli in the air will convert the sugars into lactic acid, preserving the garlic.
Check for Bubbles: You may notice some bubbling, which is a sign of fermentation.
Step 6: Store the Finished Product
Refrigerate: After the fermentation period, move the jars to the refrigerator to halt the fermentation process. Fermented garlic can be stored in the fridge for several months.

4

Tips for Successful Fermentation
Avoid Direct Sunlight: Keep the fermenting garlic out of direct sunlight to maintain a consistent temperature.
Check for Spoilage: If any cloves appear moldy or have an off smell, discard them.
Use Loose Lids: Ensure the lids are loose enough to allow gases to escape but tight enough to keep out contaminants.
Health Benefits of Fermented Garlic
Enhanced Nutrients: Fermentation preserves the enzymes and nutrients in raw garlic

5

.
Improved Digestibility: The fermentation process makes garlic easier to digest.
Probiotic Properties: Fermented garlic contains beneficial bacteria that can aid in digestion.
Final Thoughts
Fermenting garlic is a simple and effective way to preserve its health benefits while making it more palatable. Whether you’re new to fermentation or an experienced home preserver, this method is a great way to extend the life of your garlic harvest. Give it a try and enjoy the delicious, nutritious results!

How to Ferment Garlic: A Step-by-Step Guide

Leave a Review

Scroll to top