How to Can Verdi Chicken Chili: A Step-by-Step Guide

1
Welcome to the Citystad Kitchen Channel! My name is Ashley, and today, I'll be guiding you through the process of canning Verdi Chicken Chili. This hearty, shelf-stable meal in a jar is perfect for quick, ready-to-eat comfort food. Let’s dive in!
.
2
Ingredients and Preparation
Before we start, check the description box for a detailed list of ingredients

3
Here's a quick rundown:Here's a quick rundown:
White navy beans: Soak these the day before for the best results.
Homemade chicken broth: Any leftover broth can be frozen for future use.

4
Onions and garlic: I prefer to sauté these before adding them to the jars for a richer flavor.
Fresh cilantro: Chopped and ready.
Chicken: Cooked and shredded.
Pickled jalapeños, salsa verde, and sea salt.

5
Step-by-Step Process
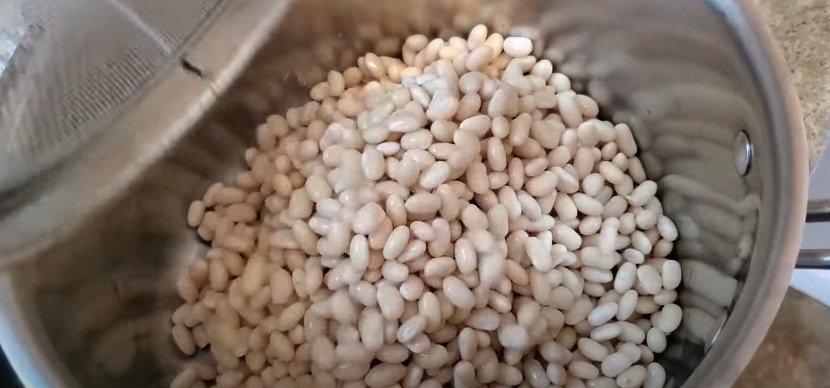
Soak and Cook the Beans:
Soak white navy beans overnight.
Cook them until tender, but not mushy, as they will cook further during the canning process.

6
Prepare the Chicken Broth:
Make a large batch of homemade chicken broth. Any excess can be frozen for later use.
Heat the broth, skimming off any fat layer once cooled. For this recipe, the fat is not needed.
Sauté Onions and Garlic:
Pre-cook the onions until caramelized. This enhances their flavor and texture.
Add garlic towards the end of the sautéing process.

7
Assemble the Ingredients:
Distribute all ingredients evenly across the jars. This includes the pre-cooked onions and garlic, chopped cilantro, cooked chicken, soaked beans, pickled jalapeños, salsa verde, and sea salt.

8
ingredients.
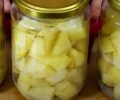
Fill the Jars:
Ensure you have enough ingredients to fill seven quart jars. Adjust the recipe quantities accordingly to avoid running the canner with partially filled jars.
Add Broth and Stir:
Pour the hot chicken broth into the jars, leaving one inch of headspace. Stir each jar to ensure even distribution of seasonings and

9
Canning Process
Prepare the Canner:
Follow your canner’s instructions for setup. Ensure all jars are properly sealed and placed inside the canner.
Canning:
Process the jars according to your canner’s guidelines. For Verdi Chicken Chili, maintaining the correct headspace and pressure is crucial to prevent siphoning and ensure a good seal.

10
Post-Canning:
After processing, let the jars cool. Check the seals and clean any residue from the jars and lids to prevent rusting.
Tips and Troubleshooting

11
Headspace Adjustment: If you notice siphoning, consider increasing the headspace to one and a half inches. While not standard, this adjustment can help maintain jar cleanliness and lid quality.

12
Customization: This chili can be transformed into a creamy soup by adding yogurt when reheating. Additionally, toppings like cheese, chips, or extra herbs can cater to individual tastes, making it versatile for family meals

13
.Final Thoughts
Canning your own Verdi Chicken Chili is a rewarding process that ensures you have a delicious, homemade meal ready whenever you need it. Experiment with the ingredients and find what works best for you. Happy canning!


Ingredients
Directions
1
Welcome to the Citystad Kitchen Channel! My name is Ashley, and today, I'll be guiding you through the process of canning Verdi Chicken Chili. This hearty, shelf-stable meal in a jar is perfect for quick, ready-to-eat comfort food. Let’s dive in!
.
2
Ingredients and Preparation
Before we start, check the description box for a detailed list of ingredients
3
Here's a quick rundown:Here's a quick rundown:
White navy beans: Soak these the day before for the best results.
Homemade chicken broth: Any leftover broth can be frozen for future use.
4
Onions and garlic: I prefer to sauté these before adding them to the jars for a richer flavor.
Fresh cilantro: Chopped and ready.
Chicken: Cooked and shredded.
Pickled jalapeños, salsa verde, and sea salt.
5
Step-by-Step Process
Soak and Cook the Beans:
Soak white navy beans overnight.
Cook them until tender, but not mushy, as they will cook further during the canning process.
6
Prepare the Chicken Broth:
Make a large batch of homemade chicken broth. Any excess can be frozen for later use.
Heat the broth, skimming off any fat layer once cooled. For this recipe, the fat is not needed.
Sauté Onions and Garlic:
Pre-cook the onions until caramelized. This enhances their flavor and texture.
Add garlic towards the end of the sautéing process.
7
Assemble the Ingredients:
Distribute all ingredients evenly across the jars. This includes the pre-cooked onions and garlic, chopped cilantro, cooked chicken, soaked beans, pickled jalapeños, salsa verde, and sea salt.
8
ingredients.
Fill the Jars:
Ensure you have enough ingredients to fill seven quart jars. Adjust the recipe quantities accordingly to avoid running the canner with partially filled jars.
Add Broth and Stir:
Pour the hot chicken broth into the jars, leaving one inch of headspace. Stir each jar to ensure even distribution of seasonings and
9
Canning Process
Prepare the Canner:
Follow your canner’s instructions for setup. Ensure all jars are properly sealed and placed inside the canner.
Canning:
Process the jars according to your canner’s guidelines. For Verdi Chicken Chili, maintaining the correct headspace and pressure is crucial to prevent siphoning and ensure a good seal.
10
Post-Canning:
After processing, let the jars cool. Check the seals and clean any residue from the jars and lids to prevent rusting.
Tips and Troubleshooting
11
Headspace Adjustment: If you notice siphoning, consider increasing the headspace to one and a half inches. While not standard, this adjustment can help maintain jar cleanliness and lid quality.
12
Customization: This chili can be transformed into a creamy soup by adding yogurt when reheating. Additionally, toppings like cheese, chips, or extra herbs can cater to individual tastes, making it versatile for family meals
13
.Final Thoughts
Canning your own Verdi Chicken Chili is a rewarding process that ensures you have a delicious, homemade meal ready whenever you need it. Experiment with the ingredients and find what works best for you. Happy canning!
Leave a Review
Please log in or register for a new account in order to leave a review.