How to Can Black Beans at Home: A Step-by-Step Guide

dry beans
water
1
Welcome to Outdoors and Country Living! Today, we’ll show you how to can delicious and versatile black beans. Perfect for various dishes, canned black beans are a fantastic addition to your pantry. Let’s get started!
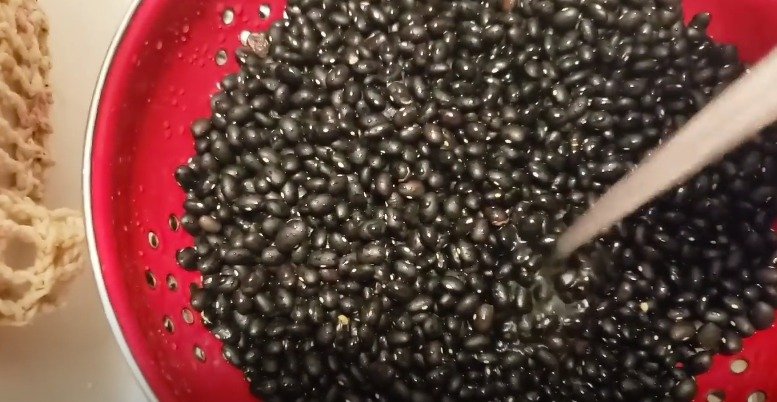
Step 1: Sort and Rinse the Beans
First, measure out your beans. For this recipe, we’re using 4 1/2 cups of black beans. As you measure, sort through the beans to remove any rocks or debris. Give them a good rinse to ensure they’re clean.
2
Step 2: Prepare Your Pressure Cooker
We’ll be using a 16-quart Presto pressure cooker, a favorite among many home canners. Start by adding 3 quarts of water to the cooker. To prevent mineral buildup due to hard water, add 2 tablespoons of vinegar. Ensure your pressure cooker is in good working order: check the gauge, the vent pipe, and the sealing ring. Make sure the vent pipe is clear by looking through it or cleaning it with a toothpick if necessary.
Step 3: Prepare the Jars
You’ll need 9 pint jars for this recipe. Clean and sterilize the jars, but keep them at room temperature. This prevents the jars from cracking when they are filled with room temperature beans and water.

3
Step 4: Add Beans to Jars
Fill each pint jar with 1/2 cup of black beans. If you’re using quart jars, increase the amount to 1 cup of beans per jar. Add 1/2 teaspoon of canning salt to each pint jar. You can also add your favorite spices; we recommend 1/2 teaspoon each of garlic powder and ground cumin for a flavorful touch.
Step 5: Fill Jars with Water
Fill the jars with water up to 1 inch from the top. The water should be at room temperature. If you prefer, you can use vegetable or chicken broth instead of water.

4
Step 6: Remove Air Bubbles and Clean the Rims
Use a debubbler to remove any air bubbles in the jars. Wipe the rims of the jars with a clean, damp cloth to ensure there’s no debris that could interfere with the seal.
Step 7: Apply Lids and Bands
Place the lids on the jars, securing them with the bands. Tighten the bands until they are fingertip tight.
Step 8: Process in Pressure Cooker
Place the jars in the pressure cooker. Align the arrows on the lid and the body of the cooker, then secure the lid. Turn the heat to medium-high and wait for steam to start coming out of the vent pipe. Once the steam is steady, set a timer for 10 minutes to let the steam vent.
Step 9: Add the Weight and Process
After 10 minutes of venting, place the weight on the vent pipe. For black beans, process at 10 pounds of pressure for 75 minutes if you are using pint jars, or 90 minutes for quart jars. Adjust the pressure according to your altitude.

5
Step 10: Cool and Store
Once the processing time is complete, turn off the heat and let the pressure cooker cool down naturally. This will take about an hour. Once it’s safe to open, remove the jars and place them on a towel. Let them sit undisturbed for 12-24 hours. Check the seals before storing the jars in a cool, dark place.
Enjoy Your Homemade Canned Black Beans!
Canning your own black beans is a rewarding and cost-effective way to ensure you always have a healthy, versatile ingredient on hand. They’re perfect for soups, stews, casseroles, and more.
Happy canning!

Ingredients
dry beans
water
Directions
1
Welcome to Outdoors and Country Living! Today, we’ll show you how to can delicious and versatile black beans. Perfect for various dishes, canned black beans are a fantastic addition to your pantry. Let’s get started!
Step 1: Sort and Rinse the Beans
First, measure out your beans. For this recipe, we’re using 4 1/2 cups of black beans. As you measure, sort through the beans to remove any rocks or debris. Give them a good rinse to ensure they’re clean.
2
Step 2: Prepare Your Pressure Cooker
We’ll be using a 16-quart Presto pressure cooker, a favorite among many home canners. Start by adding 3 quarts of water to the cooker. To prevent mineral buildup due to hard water, add 2 tablespoons of vinegar. Ensure your pressure cooker is in good working order: check the gauge, the vent pipe, and the sealing ring. Make sure the vent pipe is clear by looking through it or cleaning it with a toothpick if necessary.
Step 3: Prepare the Jars
You’ll need 9 pint jars for this recipe. Clean and sterilize the jars, but keep them at room temperature. This prevents the jars from cracking when they are filled with room temperature beans and water.
3
Step 4: Add Beans to Jars
Fill each pint jar with 1/2 cup of black beans. If you’re using quart jars, increase the amount to 1 cup of beans per jar. Add 1/2 teaspoon of canning salt to each pint jar. You can also add your favorite spices; we recommend 1/2 teaspoon each of garlic powder and ground cumin for a flavorful touch.
Step 5: Fill Jars with Water
Fill the jars with water up to 1 inch from the top. The water should be at room temperature. If you prefer, you can use vegetable or chicken broth instead of water.
4
Step 6: Remove Air Bubbles and Clean the Rims
Use a debubbler to remove any air bubbles in the jars. Wipe the rims of the jars with a clean, damp cloth to ensure there’s no debris that could interfere with the seal.
Step 7: Apply Lids and Bands
Place the lids on the jars, securing them with the bands. Tighten the bands until they are fingertip tight.
Step 8: Process in Pressure Cooker
Place the jars in the pressure cooker. Align the arrows on the lid and the body of the cooker, then secure the lid. Turn the heat to medium-high and wait for steam to start coming out of the vent pipe. Once the steam is steady, set a timer for 10 minutes to let the steam vent.
Step 9: Add the Weight and Process
After 10 minutes of venting, place the weight on the vent pipe. For black beans, process at 10 pounds of pressure for 75 minutes if you are using pint jars, or 90 minutes for quart jars. Adjust the pressure according to your altitude.
5
Step 10: Cool and Store
Once the processing time is complete, turn off the heat and let the pressure cooker cool down naturally. This will take about an hour. Once it’s safe to open, remove the jars and place them on a towel. Let them sit undisturbed for 12-24 hours. Check the seals before storing the jars in a cool, dark place.
Enjoy Your Homemade Canned Black Beans!
Canning your own black beans is a rewarding and cost-effective way to ensure you always have a healthy, versatile ingredient on hand. They’re perfect for soups, stews, casseroles, and more.
Happy canning!
Leave a Review
Please log in or register for a new account in order to leave a review.