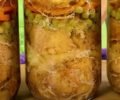
Canning Celery: A Step-by-Step Guide

celery
water
vinegar
1
Today, we're diving into one of my favorite canning projects: canning celery. This process has been a staple in my kitchen for years, thanks to the invaluable lessons from Bev at Our Half Acre Homestead. Having canned celery on hand is a game-changer for soups, stews, and creamy dishes. Let's get started!

2
Ingredients and Equipment
Fresh celery stalks (we're using six for this batch)
Boiling water
Tattler lids
Clean jars and bands
Large pot
Strainer
Tea kettle
Vinegar
Preparing the Celery
Clean and Chop: Start by chopping the celery into even pieces. Any leftover bits can be given to your chickens if you have them.
Blanching: Boil water in a large pot. Once it's boiling, add the celery and blanch for three minutes. This step helps preserve the color and texture of the celery.
Preparing the Jars and Lids
Sterilize Jars: Wash your jars in hot soapy water and keep them hot until you're ready to use them.
Prepare Lids: Place the Tattler lids in boiling water. This will ensure they're ready to create a good seal when you start canning.

3
Canning Process
Fill the Jars: Once the celery is blanched, use a strainer to remove it from the boiling water. Pack the celery into the hot jars, leaving a one-inch headspace.
Add Boiling Water: Pour boiling water from the tea kettle into the jars, maintaining the one-inch headspace.
De-Bubble: Use a non-metallic utensil to remove air bubbles from the jars. Ensure the celery is fully submerged.
Seal the Jars: Wipe the rims of the jars with vinegar to ensure they're clean. Place the Tattler lids on the jars, then secure them with the bands until fingertip tight.
Process in Canner: Place the jars in a pressure canner with hot water. Vent steam for 10 minutes before sealing and processing at 11 pounds of pressure for 35 minutes.
Cooling and Storing
Cool the Jars: After processing, let the jars cool in the canner until the pressure drops naturally. Remove the jars and let them cool completely on a towel.

4
Check Seals: Once cooled, check the seals by pressing the center of each lid. If it doesn't pop, the jar is sealed correctly.

5
Tips and Tricks
Blanching: Don't skip this step. It helps maintain the celery's texture and prevents floating.
De-Bubbling: Ensures that there are no air pockets which can affect the seal and shelf life.
Using Tattler Lids: Follow the manufacturer's instructions for the best results.

6
Conclusion
Canning celery is a wonderful way to have this versatile vegetable ready for your soups, stews, and other dishes. It's a perfect pantry staple, especially during the winter months when fresh produce can be hard to come by.
Happy canning, and enjoy your delicious, homemade canned celery!

Ingredients
celery
water
vinegar
Directions
1
Today, we're diving into one of my favorite canning projects: canning celery. This process has been a staple in my kitchen for years, thanks to the invaluable lessons from Bev at Our Half Acre Homestead. Having canned celery on hand is a game-changer for soups, stews, and creamy dishes. Let's get started!

2
Ingredients and Equipment
Fresh celery stalks (we're using six for this batch)
Boiling water
Tattler lids
Clean jars and bands
Large pot
Strainer
Tea kettle
Vinegar
Preparing the Celery
Clean and Chop: Start by chopping the celery into even pieces. Any leftover bits can be given to your chickens if you have them.
Blanching: Boil water in a large pot. Once it's boiling, add the celery and blanch for three minutes. This step helps preserve the color and texture of the celery.
Preparing the Jars and Lids
Sterilize Jars: Wash your jars in hot soapy water and keep them hot until you're ready to use them.
Prepare Lids: Place the Tattler lids in boiling water. This will ensure they're ready to create a good seal when you start canning.

3
Canning Process
Fill the Jars: Once the celery is blanched, use a strainer to remove it from the boiling water. Pack the celery into the hot jars, leaving a one-inch headspace.
Add Boiling Water: Pour boiling water from the tea kettle into the jars, maintaining the one-inch headspace.
De-Bubble: Use a non-metallic utensil to remove air bubbles from the jars. Ensure the celery is fully submerged.
Seal the Jars: Wipe the rims of the jars with vinegar to ensure they're clean. Place the Tattler lids on the jars, then secure them with the bands until fingertip tight.
Process in Canner: Place the jars in a pressure canner with hot water. Vent steam for 10 minutes before sealing and processing at 11 pounds of pressure for 35 minutes.
Cooling and Storing
Cool the Jars: After processing, let the jars cool in the canner until the pressure drops naturally. Remove the jars and let them cool completely on a towel.

4
Check Seals: Once cooled, check the seals by pressing the center of each lid. If it doesn't pop, the jar is sealed correctly.

5
Tips and Tricks
Blanching: Don't skip this step. It helps maintain the celery's texture and prevents floating.
De-Bubbling: Ensures that there are no air pockets which can affect the seal and shelf life.
Using Tattler Lids: Follow the manufacturer's instructions for the best results.

6
Conclusion
Canning celery is a wonderful way to have this versatile vegetable ready for your soups, stews, and other dishes. It's a perfect pantry staple, especially during the winter months when fresh produce can be hard to come by.
Happy canning, and enjoy your delicious, homemade canned celery!

Leave a Review
Please log in or register for a new account in order to leave a review.


