Step-by-Step Guide to Dry Pack Canning Potatoes

potatoes
1
Hey y'all, I'm Crystal! Welcome back to my Texas garden and our kitchen. Today, we're embarking on a canning project that's a bit on the rebellious side: dry pack canning potatoes. If you remember my previous video, we used the traditional and approved method for canning potatoes. This time, we're shaking things up a bit.
Disclaimer: Not an Approved Method
Before we dive in, it's important to note that the dry pack method for canning potatoes is not an approved method. If you decide to try this at home, you're assuming all the risk. Now, with that out of the way, let's get started!
Step 1: Prepping the Potatoes
First, we'll peel the potatoes. This step is optional and based on personal preference. I prefer to peel them because I don't particularly care for the thick potato skin. If you decide to leave the skins on, make sure to scrub them really well. While peeling, keep the potatoes submerged in cold tap water to prevent them from turning black.

2
Step 2: Chopping the Potatoes
Once peeled, rinse the potatoes off and start chopping them into bite-sized pieces. Keep these pieces submerged in water as well. This helps to prevent any discoloration and maintains their freshness.

3
Step 3: Rinsing the Potatoes
After chopping, you'll notice the water gets murky due to the starch from the potatoes. Rinse them multiple times until the water runs clear. This may take a few rinses, but it's worth it to reduce the starch.

4
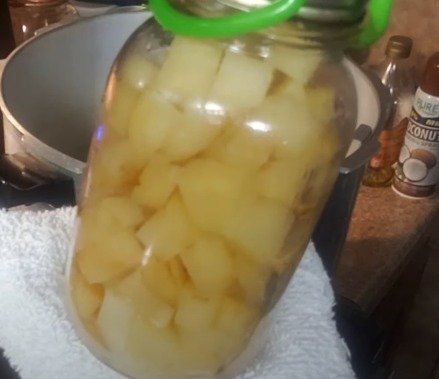
Step 4: Packing the Jars
Drain the potatoes and let them dry a bit before packing. Using clean jars and a canning funnel, loosely pack the potatoes into the jars. Tap them down with the palm of your hand to ensure they're packed nicely. Leave about a quarter-inch headspace in each jar.

5
Step 5: Prepping the Canner
Clean the rims of the jars with a paper towel dipped in white vinegar. Prep your canner according to the manufacturer's instructions. For my Presto 23 canner, I add the recommended amount of water and heat up the lids and rubber gaskets.

6
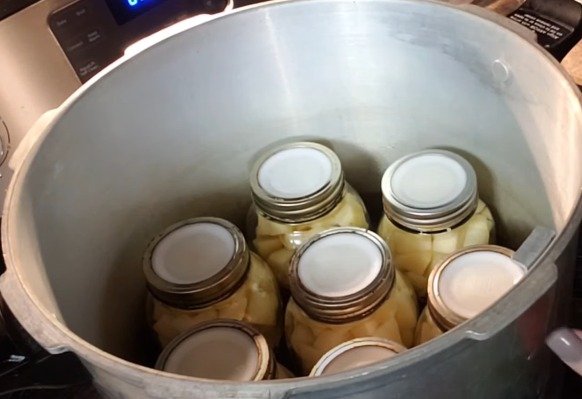
Step 6: Canning Process
Place the jars in the canner. Make sure everything, including the water and the jars' contents, comes up to temperature at the same time. This prevents the jars from cracking. Vent the canner for 10 minutes once it reaches temperature, then add the jiggler. For my altitude, I pressure can at 10 pounds. Quart jars process for 40 minutes, and pint jars process for 35 minutes. Monitor the pressure to ensure it doesn't drop too low.

7
Step 7: Cooling Down
Once the processing time is up, let the pressure in the canner come down naturally. After about 10 minutes, carefully remove the lid, opening it away from you to avoid steam burns. Remove the jars and let them cool for 24 hours. Tighten the rings and store them.
8
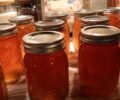
Final Product
After cooling, the jars will have a little liquid at the bottom. This is just starch and is completely normal. These canned potatoes will last up to a year in your pantry. Even though this method isn't approved, I prefer it for the superior taste and texture.
You can also season these potatoes before canning. I kept mine plain this time for versatility in future meals. Stay tuned for another video where I'll show you how to season them!
Happy canning, y'all!


Ingredients
potatoes
Directions
1
Hey y'all, I'm Crystal! Welcome back to my Texas garden and our kitchen. Today, we're embarking on a canning project that's a bit on the rebellious side: dry pack canning potatoes. If you remember my previous video, we used the traditional and approved method for canning potatoes. This time, we're shaking things up a bit.
Disclaimer: Not an Approved Method
Before we dive in, it's important to note that the dry pack method for canning potatoes is not an approved method. If you decide to try this at home, you're assuming all the risk. Now, with that out of the way, let's get started!
Step 1: Prepping the Potatoes
First, we'll peel the potatoes. This step is optional and based on personal preference. I prefer to peel them because I don't particularly care for the thick potato skin. If you decide to leave the skins on, make sure to scrub them really well. While peeling, keep the potatoes submerged in cold tap water to prevent them from turning black.
2
Step 2: Chopping the Potatoes
Once peeled, rinse the potatoes off and start chopping them into bite-sized pieces. Keep these pieces submerged in water as well. This helps to prevent any discoloration and maintains their freshness.
3
Step 3: Rinsing the Potatoes
After chopping, you'll notice the water gets murky due to the starch from the potatoes. Rinse them multiple times until the water runs clear. This may take a few rinses, but it's worth it to reduce the starch.
4
Step 4: Packing the Jars
Drain the potatoes and let them dry a bit before packing. Using clean jars and a canning funnel, loosely pack the potatoes into the jars. Tap them down with the palm of your hand to ensure they're packed nicely. Leave about a quarter-inch headspace in each jar.
5
Step 5: Prepping the Canner
Clean the rims of the jars with a paper towel dipped in white vinegar. Prep your canner according to the manufacturer's instructions. For my Presto 23 canner, I add the recommended amount of water and heat up the lids and rubber gaskets.
6
Step 6: Canning Process
Place the jars in the canner. Make sure everything, including the water and the jars' contents, comes up to temperature at the same time. This prevents the jars from cracking. Vent the canner for 10 minutes once it reaches temperature, then add the jiggler. For my altitude, I pressure can at 10 pounds. Quart jars process for 40 minutes, and pint jars process for 35 minutes. Monitor the pressure to ensure it doesn't drop too low.
7
Step 7: Cooling Down
Once the processing time is up, let the pressure in the canner come down naturally. After about 10 minutes, carefully remove the lid, opening it away from you to avoid steam burns. Remove the jars and let them cool for 24 hours. Tighten the rings and store them.
8
Final Product
After cooling, the jars will have a little liquid at the bottom. This is just starch and is completely normal. These canned potatoes will last up to a year in your pantry. Even though this method isn't approved, I prefer it for the superior taste and texture.
You can also season these potatoes before canning. I kept mine plain this time for versatility in future meals. Stay tuned for another video where I'll show you how to season them!
Happy canning, y'all!
Leave a Review
Please log in or register for a new account in order to leave a review.